Wednesday, December 31, 2014

Paris By Thirteen, Part One


     Here is my last project for Unique Laser Designs and for 2014, really.  This project is a set of G45 tags that will be part of a memento that I will give to my niece.

     In August I was able to go with my kids, my mom, and my thirteen year old niece to Paris.  I hope everyone enjoyed Paris with me!


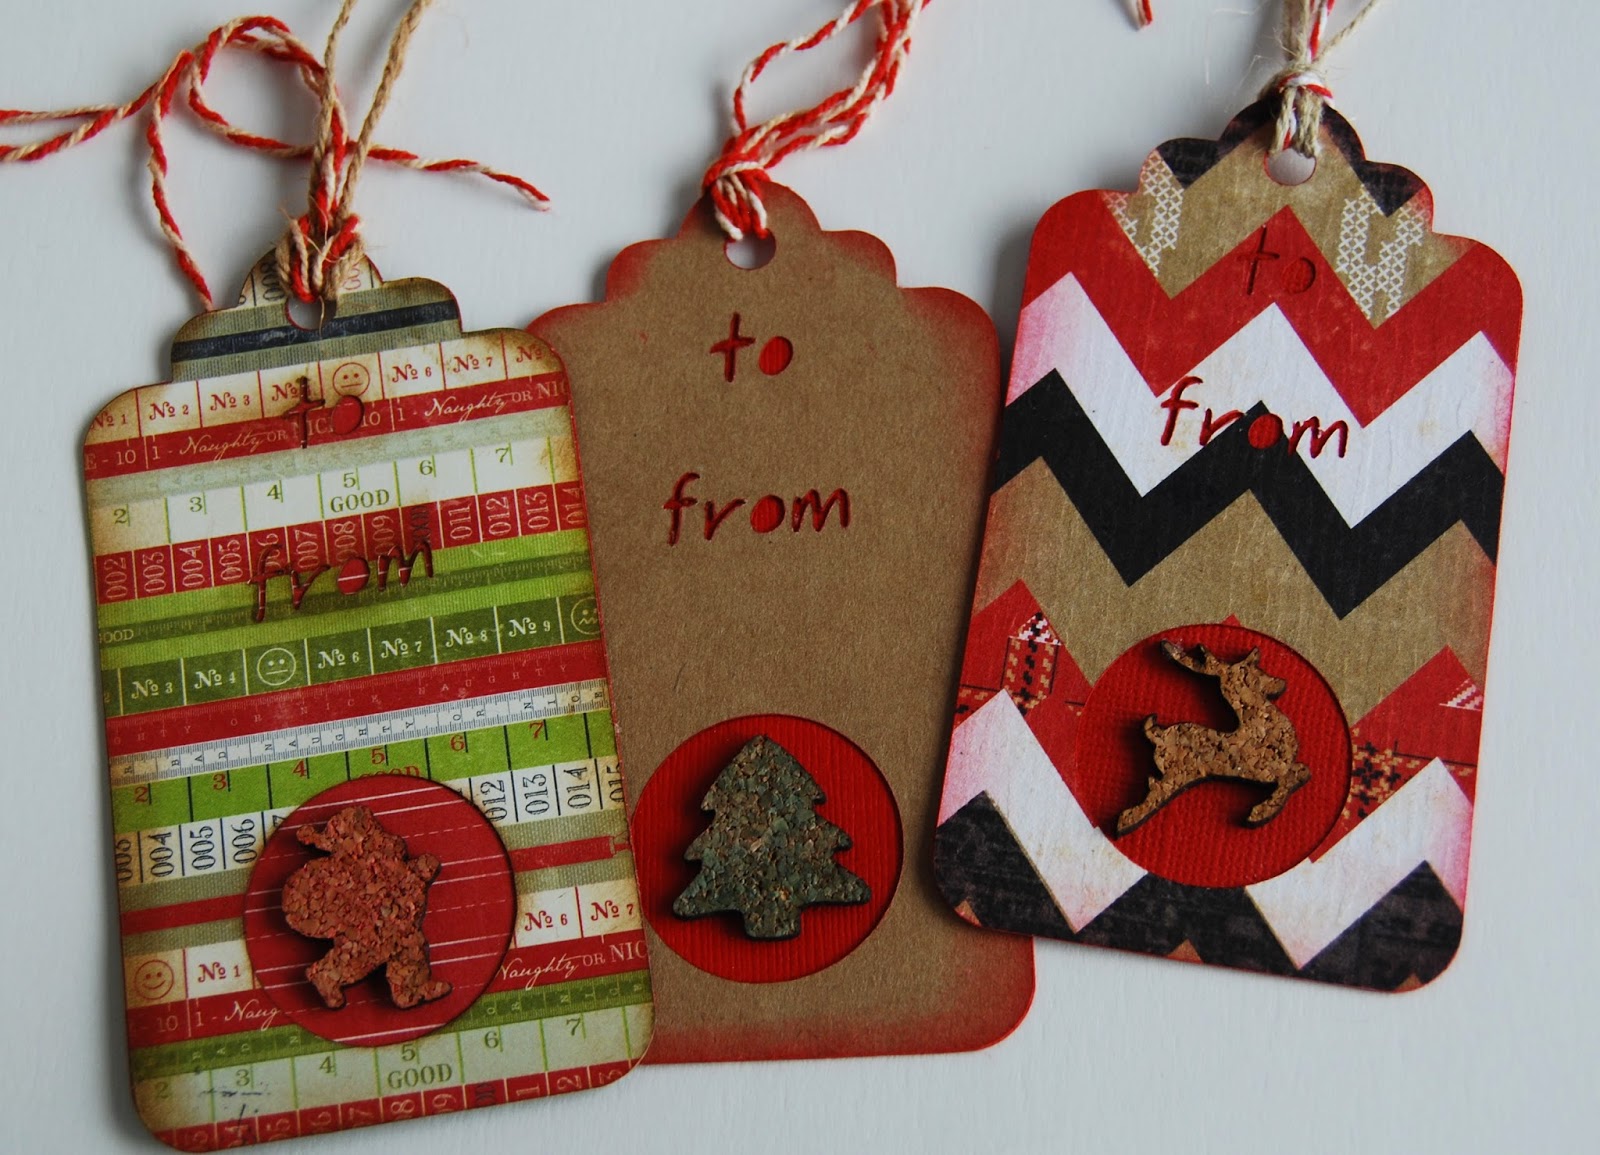
I did not cover the tags with paper.  I stamped the kraft tags and then I used embossing powder on the edges.


Each tag was layered in Prima's Cartographer paper that was machine stitched and the edges were embossed as well.


The last page on the tag ring was kept simple on purpose.  I used accordion folded paper here to create a spot for private journaling.


     Thanks for stopping by and taking having look!  I hope to have Part Two (the tag box) finished soon!

Products:
G45: tags
Prima: paper, star brads, stamp
Unique Laser Designs: die cuts
Distress Ink
Lindy's Stamp Gang

Saturday, December 27, 2014

Y is for Yuck!

Our new challenge is sponsored by the letter Y.  


What is yucky?  I understand that one person's yuck can be another person's "OOH  AAH!"  I know that my yuck is popular with others.  Here is my "Y is for Yuck" project.  Can you guess what I find yucky?


     My yuck is yellow.  I've done a project on my dislike of yellow before.  You can see it here.
   
     I found that it was difficult to do a card intending to use something that I dislike.  I dragged my feet until the last minute.  There isn't snarky content on this card, as my grandmother's birthday is coming up.  I hope she likes yellow.

     You can visit my Snarky Sisters and our guest designer, Veerle, to find out what their yuck is.


Saturday, December 13, 2014

Christmas Market Layout for Unique Laser Designs


  Hello everyone!  Today I am sharing a holiday layout that I made for .  I must confess that this is the second layout that I have completed all year.  It was really nice working on the page again.  I might make more than two layouts next year.  That will be my New Year's Resolution for 2015.


  On the layout I used watered down white acrylic paint to subdue the patterned paper, then I added more white paint in areas.  Using a polka dot stencil, I sprayed Lindy's Opal Sea Oats Starburst spray and then I used the same stencil with an embossing marker to add the Candy Cane Red Gold embossing powder.  On the red paper I applied the Queen of Hearts Flat Fabio spray for the red on red polka dots.  I used the Tibetan Poppy Teal spray lightly on the juniper leaf die cuts, and added few splats of it as well.  You can see the teal color better on the detail photo.

  I am entering this layout in the Lindy's Stamp Gang December Color Challenge and the December challenge at Scrap Around the World.  The SATW mood board inspired me with those icy lights in the jar and the "baby it's cold outside" sign.  I love being in Germany while the Christmas markets (Weihnachtsmarkt) are happening.  There is so much to see at the markets and new goodies to taste.


This is the little reindeer from Unique Laser Designs.

Thanks for stopping by and having a peek!

Have a Spanking Good Christmas

  The 23rd challenge at the Sisterhood of Snarky Stampers is here!  I'm so excited for this one because the theme is N is for Naughty.  We want you to make Christmas naughty.  Keep me laughing, please, so I make it through the holiday!


  Is that Edna on her own sweater?


  As I was looking for ideas to steal--I mean inspiration and quotes to use for this project, I found this image.  I really liked it because it wasn't a scantily clad woman on Santa's lap getting spanked.  I decided to turn it into a digital stamp to use on a Christmas card.  I made eight of these cards to send to my Snarky Sisters.  I hope they like them since there isn't a surprise now!


  I hope that I have given you a chuckle.  This would be my gift to you to get you through the holidays.  If you visit my Snarky Sister's, as well as our guest designer, Leslie's, blogs I am sure you will get a few laughs.  We love these kinds of challenges!  

Snarky Sisters


You have until 11:55 pm (EST) on Friday December 26 to enter the N is for Naughty Christmas Challenge!


Saturday, November 29, 2014

V is for Vintage


   Hello and welcome to our 22nd challenge at the Sisterhood of Snarky Stampers!  This time round Edna wants to see what you bring for vintage.  Be cool, be retro.  

Here is my take on vintage:


and the inside:


   My card is autobiographical.  My husband has said that he thinks I was a house cat in my past life.

   This stamp set is from Crackerbox Palace.  They are a little independent store in Wisconsin and they have a great selection.  Hint, hint.  And no, I'm not affiliated with them.  The papers are from G45's Domestic Goddess collection.

   If you have enjoyed my card, please visit my sisters and see what they have for this challenge.

Thanks for stopping by!


Friday, November 28, 2014

All is Calm Christmas Canvas


Hello again! I hope everyone enjoyed their Thanksgiving, or have found some excellent Black Friday deals. I'm only shopping online this year, so I won't see you out there!


I love the snow.  I really love being in a quiet snowy place and I cannot think of a more peaceful setting.  This was the feeling that I was thinking of when I put this canvas together.

I used wood laser cuts from Unique Laser Designs on this canvas. The Swirly Christmas Tree was lightly brushed with gesso, leaving some of the wood bare.  I wanted to make the tree look like it was snow covered.  After the tree was dry I gave it some green ink. 
 The reindeer was given two separate coats of embossing powder.  The body, head, and ears were covered in a translucent powder and the antlers were covered in gold glitter embossing powder.  The reindeer is shiny and sparkly, but you're going to have to take my word for it.

If you're going to be brave and go shopping today, take a deep breath and remember "All is Calm."  May it bring you a moment of peace.  Good luck out there!


Shameless plug for my sponsor:
ULD also has a Black Friday sale.  Click here to check them out!

Tuesday, November 18, 2014

Christmas Tags for Unique Laser Designs

This is my pasted post from Unique Laser Designs today!

 Hello everyone!  I have finally gotten into the Christmas spirit and have crafted something Christmassy.  Not bad for me since there are still 36 days until Christmas.  Usually I would make something like this at 11 pm on Christmas Eve!  Just call me "Last Minute Lee."

There are plenty of Christmas wrapping products that you can go out and purchase to make your life easier.  One of those products are the sticker to/from labels that you're supposed to slap onto your gift.  You know the kind I'm talking about?  The package of 300 labels that you can only use 10 of because all the others are too small to actually write a person's name on?  The ones that get stored for years in your Christmas things and wind up losing their stickiness?

 This year I decided to make my own to/from tags. I used last year's left over Christmas scrapbook patterned paper, red card stock, and kraft paper.  I'm always looking for ways to use my scraps.  I'm positive that someone else out there has a dedicated container (box, drawer, storage shed, etc) full of Christmas crafting supplies.  Right?  Anyone?

I have used my Silhouette machine to cut these tags.  If you want, leave me a comment and I will share my file.  These tags can be made without fancy machines though.  You would only need a circle punch large enough to display the cork accent.

The mini Christmas shapes are cut out of cork.  I decided to give them a wash of ink so that the cork texture would remain visible.  To do this I scribbled marker onto to a craft mat and added water.  Then I slid the cork shape through the inky puddle.

Thanks for stopping by!
-Lee

Sunday, November 16, 2014

P is for Profanity at the Sisterhood of Snarky Stampers

Challenge #21 is brought to you by the letter "P."  P is for Profanity: Swear if you dare.  You know you want to play along.  Who hasn't wanted to unleash their inner naughty crafter every now and then?  Come on and play with us, Edna is giving you profanity permission!


I don't think that Edna would use profanity unless she dropped a bowling ball on her foot or spilled a pan of lasagna on her new white sweater.


Please join us at the Sisterhood of Snarky Stampers for our newest challenge. You have until 11:55 pm (EST) on Friday, November 28 to upload your project.  Please visit my Snarky Sisters, and our guest designer, Lauren, to see what they have created, and I will warn you, they have met this challenge with gusto. If blue language offends you, don't visit their links.


Thanks for stopping by.  


Monday, November 10, 2014

Thanks Tea You

Hello Everyone!  

I had been offered the opportunity to be a guest designer at Craft Hoarders Anonymous and today I am able to share my first project for them.  This was created for their "For All That You Do, Thank You" challenge.

Here is the challenge information stolen directly from their blog:

Challenge #19 For All that You Do, Thank You!
Create a "thank you" gift for this challenge. It can be a Thanksgiving hostess gift or a simple thank you card. It can be a "thanks for helping me out of a jam" present, or a "thanks for being you" scrapbook layout. As long as your project says, "THANKS," enter the challenge! We want to see you de-hoard some of your stash and say thanks to someone! (Your project does not have to be Thanksgiving-themed!)

You still have a week to play in Challenge #19! You have until midnight PT November 16th to link up your creation. CLICK HERE to see the challenge post and LINK your project!


This project had to say "Thanks" in some way.  I decided a washi tape tin turned into a small tea box would make a nice little thank you gift.  


This is not my usual style.  I am not a shabby girl at heart, but I thought that a tea tin would look great in this style.  The fairy in the tea cup has been inspired by one of my favorite paper artists, Renea Bouquets.  I would say that this tin is my homage to her.  Click here to see the project of hers that I just love.

I have waited a year to put a fairy in a tea cup!  I hope I did Renea proud.  

Thanks for stopping by and having a peek!


Want details?

The paper, wood embellishments*, and flowers are all Prima. 
The tea cup and saucer and paper border are Silhouette files.
Tiny tag is a QuicKutz die, with computer generated font.
Alphabet stamp is Stampers Anonymous (Staz-On).
Distress Ink: Worn Lipstick, Pumice Stone, Brushed Corduroy.
Lindy's Stamp Gang: Alpine Ice Rose, Wild Honeysuckle Coral.
Liquitex Gesso.
Lace.
Cheesecloth.
Tin: Cavallini & Co.


 *except for the butterfly, which was thrown into my box of wood embellishments.  Its origin has been long forgotten.  

Saturday, October 18, 2014

Hopeful Halloween with the Sisterhood of Snarky Stampers

This is where we couldn't decide between Breast Cancer Awareness and Halloween. We love our Halloween.  For some of us, breast cancer is very close to our hearts (and breasts).  So we combined the challenge.  

Pink for Halloween!

You can choose a Cancer themed card, or go for Halloween in pink.

Let me show Edna in her October glory:


I made a tag for Pink Halloween.  I did a sparkly witch in flight on her broom.  If I could fly away on my broom whenever I wanted, I don't think I'd ever stay home. And my hair would look great when I arrived because I would have good hair magic!  


Please check out the other DT Members and their inspiration for this challenge.  You'll have some chuckles.  Especially don't miss our GD, Pamela, who has made a fabulous card!


Tuesday, October 14, 2014

Artist Trading Block

Please let me share my newest project with you.  I have made my first Artist Trading Block.  This project was fun to make, I encourage everyone to give an Artist Trading Block a try!


The block was hand made from chipboard sheets that I had been hanging onto. I used two pieces of the same length chipboard to assemble my block.  I was able to create openings for the porcelain doll head and legs.

  The chipboard lengths were covered in patterned paper before I adhered the Unique Laser Designs Circle Stencil.

I had cut the Circle Stencil into four equal parts.  Once the parts were adhered to the block,every thing was given a coat of gesso. The insides of the circles were not coated as heavily, allowing the patterned paper to peek through.

Then I began filling in circles with stickers, brads, metals or just crackle medium.  I sprayed all the sides with mists, wiping off any mist that coated the filled in circles, and topped off the colors with paint.


Once the box was assembled, I added Unique Laser Design's Angel Wings to the box.  The wings had been treated to paint and embossing powder.  

The porcelain head and legs were given a black paint wash, then covered in embossing powder.

Are you ready to try an Artist Trading Block on your own?  I highly recommend them!  
Thanks for stopping by and have a great day!

Supplies Used:

Lindey's Stamp Gang Spray Mists and Embossing Powders, Distress Paint and Embossing Powder, Glossy Accents, Crackle Accents.


Saturday, October 4, 2014

Morticia Tag

I've made another Unique Laser Designs tag to share with you today.  It's October and I am  ready for Halloween.  It's my favorite holiday, in fact it's the only time of year that I like spiders!

I have been saving this sentiment stamp for a few months.  I thought it would go perfectly with the Unique Laser Design's Spider Web.


This tag was first coated with red acrylic paint.  Then spiders were stamped over the tag and embossed with clear embossing powder.  I painted the spider web laser cut in white and gray.  On the spider I used gray and yellow gel pens.  The metal and jewel spiders are from an old set of Halloween earrings.


Thanks for stopping by and checking out my Halloween spirit!

I is for Iconic

Here is a speedy post for Challenge 18 at the Sisterhood of Snarky Stampers.  I am off to my sister's wedding today and it has been a busy week.

For this challenge Edna wants you to make something Iconic.  Your icon can be a person, place or thing, but that person, place or thing should be instantly famous and recognizable.  Here is Edna's example:


Here is my example.

Thanks for stopping by and putting up with my brief post!  Please check out what my snarky sisters have gotten up to for this challenge.

Friday, September 26, 2014

First Annual Sisters of the Snarky Sisters


We have found our people! 
There is a one woman company, Rubber Dance Art Stamps,  in far off Norway that speaks our language.  I don't mean English.  I mean SNARK!  She makes a whole rubber plate of snark!  This divine product of snarkitude must be shared, and we have accepted that challenge.


This plate is called "Sarcasm Superpowers" and it is obviously perfect for our Sisterhood. We want to share this awesomeness with you, so we are hosting our first blog hop: The Sisterhood of Snarky Stampers First Annual Spectacular September Snark Off Blog Hop!  See "Rules" below for how to win this snarkalicious prize.

We have even managed to to bamboozle some of the Rubber Dance design team into participating in the hop, as well as the Queen of Rubber Dance herself.  We all aim to ause you on your blog-land journey.

May I present you with my contribution?  I have used the "I licked it so it's mine" sentiment.  I chose this stamp in honor of all the times that my son has had to protect his food.


Here are the hop "Rules."
1. Leave a comment on each blog, beginning with Lee, and ending with Bibi on the Rubber Dance blog.
2. You have until Sep 28 11:59 pm PST to complete the hop.
3. Enjoy.

We will use some sort of free computer tool to pick a random winner and announce it on Wednesday, Oct 1.

 Your next step on the blog hop is Sister Chris's blog.

Lee  <----you are="" here="" you--="">
Bibi

Enjoy your journey!


Thursday, September 25, 2014

Happy Life Wooden Tag

Hello friends!

I have a small project to share with you today. I decorated one of Unique Laser Design's wooden tags. The tags come as a set of three, so I culled one from the herd.


The tag was given a layer of gesso, then sprayed with various mists while the gesso was still wet. I then immediately misted parts of the tag with water so the mist would look marbled. After the tag was dry, I inked a stencil on the left side. The rub-ons were added next.

I cut out paper embellishments and glued them down with gel medium.  I must have really enjoyed the gel medium, because I decided to add it over the whole tag.  Remember to use a dabbing motion when adding gel adhesive over dye ink because it will smear with your brush strokes. Once the gel had been applied, I sprinkled micro-beads over the tag. When micro-beads are applied the only sensible thing to do is add another layer of gel medium to seal those little guys in! I also gave the curly tree embellishment micro-bead treatment.

The tag was finished off with the Curly Tree laser cut, also from ULD; flowers and ribbon. Thanks for stopping by and having a look!

Saturday, September 20, 2014

How Distressing!

Hello and welcome to the new Sisterhood of Snarky Stampers biweekly challenge. #17 is brought to you by the letter "D." "D" is for Distressing, my dears. Edna surely appears to be in distress. Show us your distress techniques!


I stole was inspired by a recent tutorial by France Papillon.  You can visit her and see what I stole was  inspired by HERE. I think her work is amazing.


You have until Ocotober 3rd to get get your distressful entries loaded here.  For more distressing examples, stop by and visit the rest of my Snarky Sisters and Sandra, our guest designer.

Jessi    Lindsey    Lynne    
Chris    Karen   Donna    Barb    

Quick and Dirty How To:

My card began with a layer of gesso on 8.5 x 11" white card stock. A few strips of sheet music were added and also gessoed over. Using gel medium, I stenciled on some stars, which then were coated with glitter. The stars were given a second coat of gel medium, which did not stop them from picking up the color of the mists. The spray mists were followed with another stencil (tiny dots) which I used with tinted blue texture paste. The card edges were then distressed and inked. The sentiment (Dylusions) and the embellishments were then added. 

Monday, September 15, 2014

Vintage Keepsake Box

Hello! Today I have a box that I altered to share with you. You will have to forgive me because I dug into (again!) my favorite paper stash. Graphic 45 has the perfect paper to use for altered items that will be displayed around your home.


I knew I wanted a vintage feel to my box, then I decided to make it masculine. I imagined what sort of things a boy might collect in this box. I just moved that collection to the top of the box.


The patterned papers were trimmed to fit the sides and top of the box. I inked the edges and applied the papers to the box. I sealed the papers with matte soft gel, because I used dye ink; I did not want the ink to come off on fingers as this piece is meant to be handled. I trimmed the flourish laser cuts,  I cut one flourish in half so it could work like a latch. Flourish B's flowers were removed. I painted the latch and corners. The corners were painted black with my eyes shut (on purpose), and I was able to ink the bare spots brown.  


Thanks for stopping by and checking out my altered keepsake box. Have a great day!