Tuesday, March 29, 2016

Tuesday Morning Sketches Twofer


Hello again!  It's so nice to have you stop by to see what I have made with this week's Tuesday Morning Sketch.  Our newest sketch features an off centered tag.  I kept my cards simple this week, because I made two!


This card features a dog, wearing a cone of shame. The digital stamp is from Whimsy Doodles. It's made with the Lucky Basic Grey collection that I bought seven or eight years ago.  I'm really trying to use up my stash this year.  You see those fibers?  Same collection and never been used!


This next card features a digital slow loris stamp from Aurora Wings.  For a few more days, you can donate to the fundraiser and participate in the contest! 


If you would like to play along with this week's challenge at Tuesday Morning Sketches, you have until April 3rd to enter.  Please stop by and see what my fellow design team members have made for your inspiration!


I'd like to enter these contests this week:
Creative Knockouts: Recipe
 Crazy For Challenges C4C329 :Purple Day
Less is More #269: Polka Dots
MFP Stamp Challenge 13: Green
Cards in Envy: Just Purple!
Aurora Wings Slow Loris Fundraiser

Tuesday, March 22, 2016

All The Strong Pretty Ladies


Today brings you sketch #344, designed by teammate Debbi, at Tuesday Morning Sketches.  Sketch 344 is a lovely, simple design that would go with any project that could make.


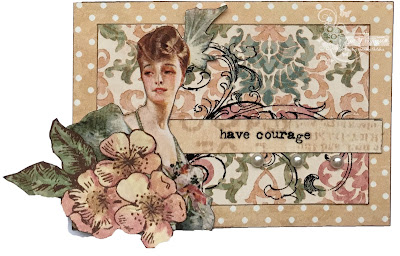
Instead of making a card, I made a trio of ATCs (Artist Trading Cards) with Graphic 45's A Ladies Diary.  Every piece of patterned paper that G45 makes has fun images to fussy cut and use on something else. The rub-ons are from Tim Holtz and Basic Grey.  I gave the ladies strong sentiments instead of just using words such as "beauty" and "grace."


If you want to play along with our sketch this week, we are being hosted by Di's Digis.  There may be a prize for you!  You have until Sunday, March 27 to enter this week's challenge.   Please stop by and visit my fellow Tuesday Morning Sketches crew!


Thanks for visiting my blog!

I'd like to enter my ATCs into these challenges:

I think my ATCs are delicate looking and they are pretty clean and simple for me!

Saturday, March 19, 2016

L is for Legend


The legendary Edna has decide to make a challenge based on her.  "L is for Legend" is the new challenge at the Sisterhood of Snarky Stampers! You might has seen one of those legendary creatures this week on St. Paddy's Day!  


The fun unicorns are from a former Guest Designer, Jess.  She has fun digital freebies on her blog, Useless Trinkets. I printed and cut the unicorns and the mug and colored them with Copic markers. The rest of the cards were made on the computer, so I could just stick those cuties on there.  

Which in theory gave me more time to work on my mermaid art doll.


The mermaid doll is from Retro Café Art, which provides tons of original cutouts for your decoration pleasure.  The only problem I have with their website is that I never have enough money for everything I want to buy.  :(

I hope my creations were legendary enough.  Your challenge is to make us creatures mythical, magical and legendary. The Sisters and I are sure you are up to the challenge!  You have until 11:55 p.m. (2355) on April 1 to enter your legendary creature at the Sisterhood of Snarky Stampers!  

Please visit my fellow Sisters and our current reigning Queen of Snark, Sharon, to see what they have come up with for this challenge!  

Jessi   Barb   Donna   Lindsey   Chris   

Thanks for stopping by my blog!


Tuesday, March 15, 2016

Tuesday Morning Sketches #343

Good morning lovelies! We have a fun new sketch up at Tuesday Morning Sketches, and a fantastic sponsor, Craftin' Desert Divas. I got to play with the absolutely adorable Coffee Couple, and the random winner this week gets to pick two digis from the store!


I was able to use this Craftin Desert Diva image called "Coffee Couple."


This challenge will be open until next Sunday, March 20 - hop on over & see what the rest of the team has made! And make sure to give a warm welcome to our two new team members, Patti & Wanda!


I'd like to enter this card into the Friday Mashup Challenge.  I used the top three colors on their color inspiration.  For shimmer I used Lindy's Stamp Gang Starburst Sprays to watercolor the coffee faces, Wink of Stella for the white cups, and added white micro glitter to the lids.


Thanks for stopping by!

Tuesday, March 8, 2016

Best Wishes

It's Tuesday and you know what that means! Tuesday Morning Sketches is sharing the new sketch of the week.  Our challenge this week is sponsored by DRS Designs.


Here is the new sketch:


The DRS Designs image I am using is Leonard Pig- Behind the Bubble.
He is a pretty cute guy. I even had a bubble embossing folder that I could use with this stamp! Because of the bubble (circle) shapes, I didn't use the rectangular shapes from the sketch.  I did keep the landscape layout and tried to layer the bubble embellishments to reflect the sketch.


I chose the "Best Wishes" sentiment from a cute memory of my son.  When he was small he would blow bubble or dandelion fluff and call them "wishes"
.  It could be very challenging to walk with him in the summer when the dandelions had gone to seed; there were so many "wishes" to stop for!

Leonard was watercolored with Distress Inks. The bubbles, both the cutouts and the raised embossing were shaded with white Pan Pastel. 

If you want to join us at Tuesday Morning Sketches this week, you have until the end of Sunday, March 13.  Please stop and visit my teammates for further inspiration! 

Melissa

Thanks for stopping by!

I would like to include my card in this challenge:


Saturday, March 5, 2016

Moon, Stars and Gears

Hello fellow snarky people!  It's time for a new challenge at The Sisterhood of the Snarky Stampers.  Challenge 54: G is for Gears is now open for your playing convieniance.  We know you have something Steampunkesque in your stashes!


My crafting goal this year is to work my way through my craft stash.  I have plenty of metal bits that I have been collecting.  With this challenge I was able to use some of those  bits up!  I layered on gears and other metal findings, adding layers of gesso, gel mediums, and beads.  I put an image from DigitalMagpie on the metal plate and secured it to the canvas board with a chain.


Please visit my fellow Snarky Sisters and our Guest Designer and current Queen of Snark, Cyndi, to see what they have made for your G is for Gear inspiration.  If you choose to play along you have until 11:55 pm EST on Friday March 18 enter your creation.  

I'm playing along at the Frilly And Funkie challenge blog, for the "Layer It Up!" Challenge.

Thanks for stopping by my blog!

Tuesday, March 1, 2016

Art Journal Travel Box Instructions


I promised that I would write up instructions about how I made my Art Journal Travel Box. I am not an instructor, so if some of my directions are hard to follow, please forgive me!


 Supplies

Dylusions paints  (Bubble Gum Pink, Lemon Zest, Squeezed Orange, and Black Marble)
Brayer
Dylusions Stencils (large Squares, small Dotted Flowers,  large Arrow Border, large Diamond of a Border.)
Dylusions Journal Block
Tiny Attacher
Paint pens in black and white
2 Tim Holtz Elastic Loops
Rubber Stamps (Black Sheep and Legs Eleven)
Manilla Folder
Gesso (not pictured)


  1. Gesso the outside of the purse and the inside sides.  
  2. Apply paint to outsides of box with brayer.  Begin with pink and yellow, followed by orange. Also paint the inside sides of the purse and your manilla folder.
  3. Stencil squares with pink paint using Mini Blending Tool. Then stencil small dots with yellow. I did not stencil the inside sides or the manilla folder.
  4. Stencil border on bottom and top side of purse with black paint,
  5. Stencil the sides of the purse with the arrow stencil in black paint.
  6. Shade along the edges of the suitcase in black paint with the Mini Blending Tool.  
  7. I drew my flowers in opposite corners with paint pens. See note blow in 14
  8. On the lid of the purse, plan out your quote, leaving room for an image to the side. Lightly pencil curvy lines with the Journal Block.
  9. Draw your letters lightly in pencil.
  10. When you are happy with your lettering, color in your letters with black paint marker.  
  11. Erase pencil lines.
  12. Outline your letters in white paint marker. I also outlined some of my border, as well as the arrows in white paint pen. 
  13. Stamp, color, and cut out the image you want on the purse.  Apply.  I used Matte medium because it can't be seen when dry. 
  14. Draw arrows for image's hair.  ***Note, this is where I wished that I had not drawn the corner flower.  Her hair/arrows would have worked better.
Inside of the Purse

  1. Cut manilla folder to fit the inside top and bottom of the purse.  
  2. Find a piece of thin chipboard. This chipboard needs to fit into the lid of the purse.
  3. Cover the piece of chipboard with left over manilla folder.  Or paint it to match.
  4. Take the elastic loops and cut off the metal bits. You should have two lengths of elastic now.
  5. Attach or staple the  elastic strips to the top of the chipboard. Mine are placed  with 2.5 inches of space between them.  (6.3 cm)
  6. Place the items that you want to keep secured inside of your art journal box on the length of chipboard.  I did groups of 2.  Stretch elastic over first group of two to figure out how tight to pull the elastic, remember that it needs enough slack to remove and return the items. Staple the elastic around the first two items.  Repeat with next group of items.
  7. Adhere manilla folder pieces to the top and bottom insides of the purse. Adhere the chipboard "tool holder" to the top inside manilla folder.


Life is Better With Friends at Tuesday Morning Sketches

Welcome back!  It's Tuesday again and that means a new challenge at Tuesday Morning Sketches!  Teammate Debbie has provided us this fun sketch.

This week we are sponsored by Bugaboo Stamps.  I love using Bugaboo digital stamps, I can always find what I need there.  For this challenge I got to choose Cute Kawaii Cat.  Now I realize that I have been making cute critter cards for the last few weeks. I promise I'll change things up soon!


I started this card with plain white card stock, which I sprayed with Dylusions Spray Inks. I decided to use red, yellow, and orange to go with the  Cute Kawaii Cat and his fish friend. The blue of the water complements the orange of the cat and background. The image was colored with Copic markers.  The elongated ticket shapes, image frame, and banner were cut with my Silhouette.

I put the sentiment on the inside of the card as I thought the front was busy enough.

You can check out the Tuesday Morning Sketches challenge page to see what kind of prize Bugaboo Stamps is offering!  You have until Sunday, March 6th to play along.  Please check out the blogs of my teammates so that you can see what they have done with their Bugaboo Stamps!

Melissa

Thanks for stopping by for a visit!