Showing posts with label Unique Laser Designs. Show all posts

Wednesday, December 31, 2014

Paris By Thirteen, Part One


     Here is my last project for Unique Laser Designs and for 2014, really.  This project is a set of G45 tags that will be part of a memento that I will give to my niece.

     In August I was able to go with my kids, my mom, and my thirteen year old niece to Paris.  I hope everyone enjoyed Paris with me!


I did not cover the tags with paper.  I stamped the kraft tags and then I used embossing powder on the edges.


Each tag was layered in Prima's Cartographer paper that was machine stitched and the edges were embossed as well.


The last page on the tag ring was kept simple on purpose.  I used accordion folded paper here to create a spot for private journaling.


     Thanks for stopping by and taking having look!  I hope to have Part Two (the tag box) finished soon!

Products:
G45: tags
Prima: paper, star brads, stamp
Unique Laser Designs: die cuts
Distress Ink
Lindy's Stamp Gang

Friday, November 28, 2014

All is Calm Christmas Canvas


Hello again! I hope everyone enjoyed their Thanksgiving, or have found some excellent Black Friday deals. I'm only shopping online this year, so I won't see you out there!


I love the snow.  I really love being in a quiet snowy place and I cannot think of a more peaceful setting.  This was the feeling that I was thinking of when I put this canvas together.

I used wood laser cuts from Unique Laser Designs on this canvas. The Swirly Christmas Tree was lightly brushed with gesso, leaving some of the wood bare.  I wanted to make the tree look like it was snow covered.  After the tree was dry I gave it some green ink. 
 The reindeer was given two separate coats of embossing powder.  The body, head, and ears were covered in a translucent powder and the antlers were covered in gold glitter embossing powder.  The reindeer is shiny and sparkly, but you're going to have to take my word for it.

If you're going to be brave and go shopping today, take a deep breath and remember "All is Calm."  May it bring you a moment of peace.  Good luck out there!


Shameless plug for my sponsor:
ULD also has a Black Friday sale.  Click here to check them out!

Tuesday, November 18, 2014

Christmas Tags for Unique Laser Designs

This is my pasted post from Unique Laser Designs today!

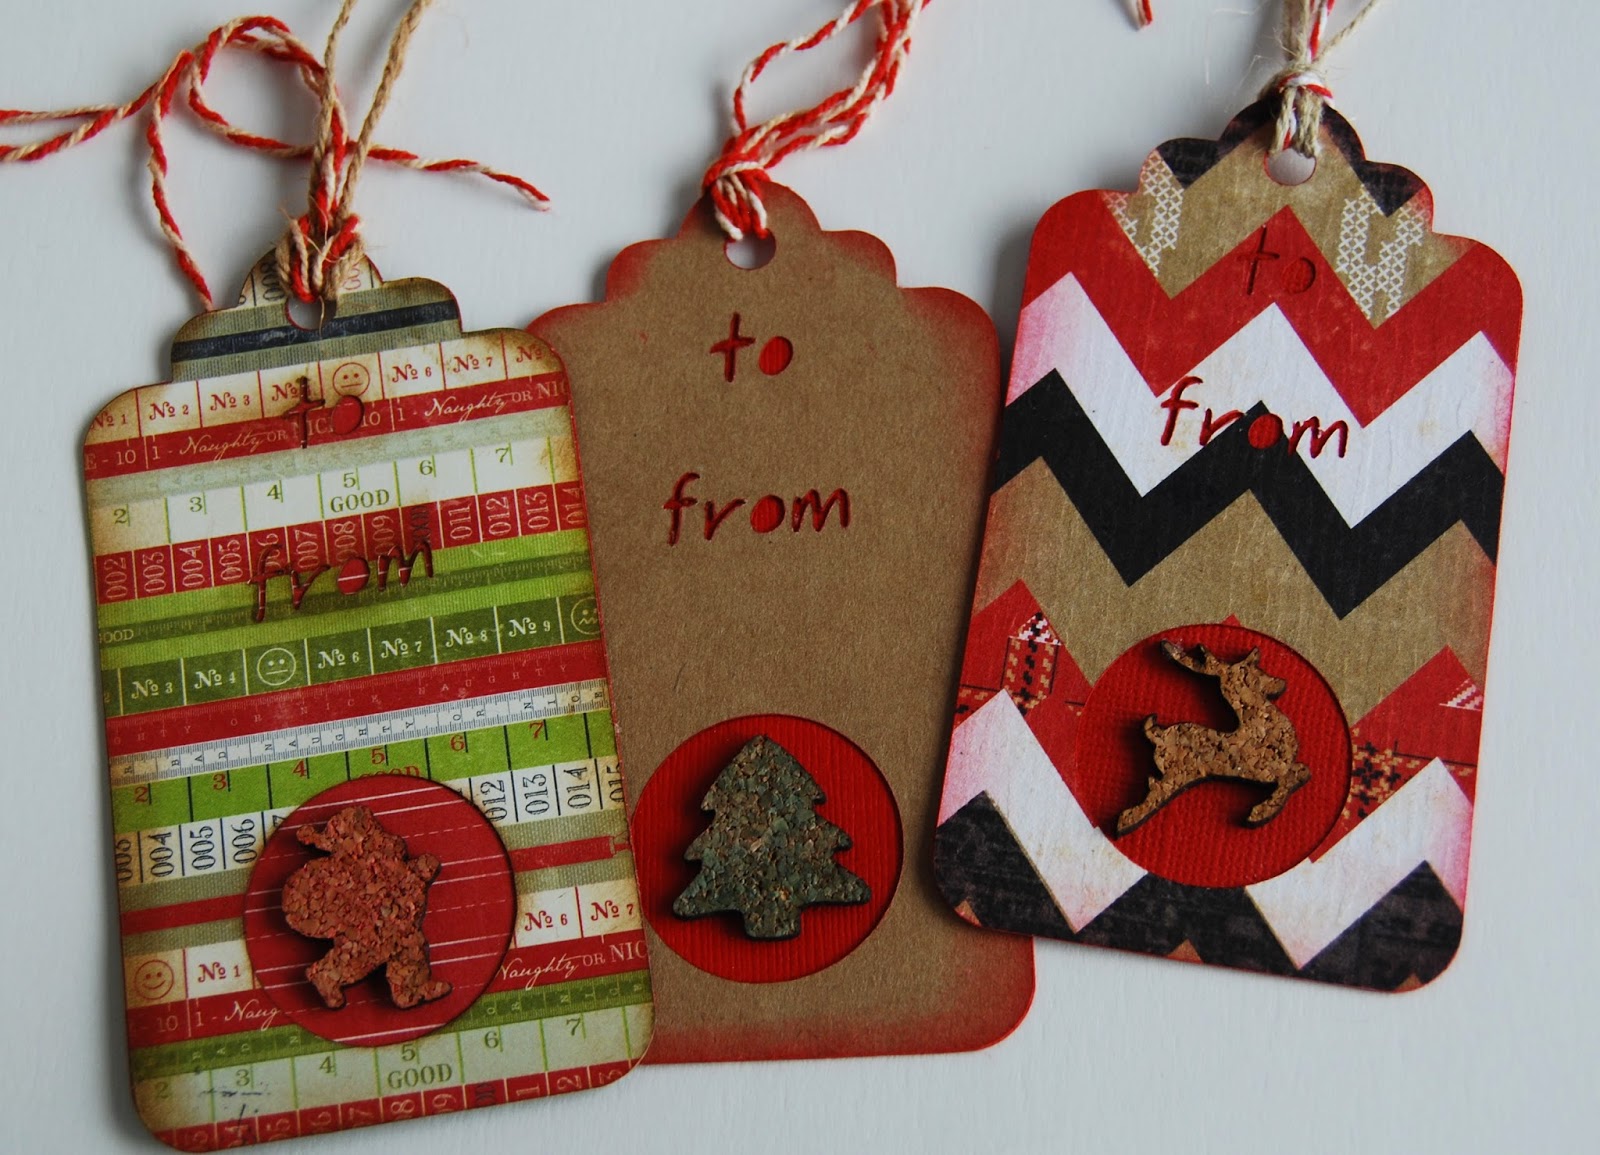
 Hello everyone!  I have finally gotten into the Christmas spirit and have crafted something Christmassy.  Not bad for me since there are still 36 days until Christmas.  Usually I would make something like this at 11 pm on Christmas Eve!  Just call me "Last Minute Lee."

There are plenty of Christmas wrapping products that you can go out and purchase to make your life easier.  One of those products are the sticker to/from labels that you're supposed to slap onto your gift.  You know the kind I'm talking about?  The package of 300 labels that you can only use 10 of because all the others are too small to actually write a person's name on?  The ones that get stored for years in your Christmas things and wind up losing their stickiness?

 This year I decided to make my own to/from tags. I used last year's left over Christmas scrapbook patterned paper, red card stock, and kraft paper.  I'm always looking for ways to use my scraps.  I'm positive that someone else out there has a dedicated container (box, drawer, storage shed, etc) full of Christmas crafting supplies.  Right?  Anyone?

I have used my Silhouette machine to cut these tags.  If you want, leave me a comment and I will share my file.  These tags can be made without fancy machines though.  You would only need a circle punch large enough to display the cork accent.

The mini Christmas shapes are cut out of cork.  I decided to give them a wash of ink so that the cork texture would remain visible.  To do this I scribbled marker onto to a craft mat and added water.  Then I slid the cork shape through the inky puddle.

Thanks for stopping by!
-Lee

Thursday, September 25, 2014

Happy Life Wooden Tag

Hello friends!

I have a small project to share with you today. I decorated one of Unique Laser Design's wooden tags. The tags come as a set of three, so I culled one from the herd.


The tag was given a layer of gesso, then sprayed with various mists while the gesso was still wet. I then immediately misted parts of the tag with water so the mist would look marbled. After the tag was dry, I inked a stencil on the left side. The rub-ons were added next.

I cut out paper embellishments and glued them down with gel medium.  I must have really enjoyed the gel medium, because I decided to add it over the whole tag.  Remember to use a dabbing motion when adding gel adhesive over dye ink because it will smear with your brush strokes. Once the gel had been applied, I sprinkled micro-beads over the tag. When micro-beads are applied the only sensible thing to do is add another layer of gel medium to seal those little guys in! I also gave the curly tree embellishment micro-bead treatment.

The tag was finished off with the Curly Tree laser cut, also from ULD; flowers and ribbon. Thanks for stopping by and having a look!

Monday, September 15, 2014

Vintage Keepsake Box

Hello! Today I have a box that I altered to share with you. You will have to forgive me because I dug into (again!) my favorite paper stash. Graphic 45 has the perfect paper to use for altered items that will be displayed around your home.


I knew I wanted a vintage feel to my box, then I decided to make it masculine. I imagined what sort of things a boy might collect in this box. I just moved that collection to the top of the box.


The patterned papers were trimmed to fit the sides and top of the box. I inked the edges and applied the papers to the box. I sealed the papers with matte soft gel, because I used dye ink; I did not want the ink to come off on fingers as this piece is meant to be handled. I trimmed the flourish laser cuts,  I cut one flourish in half so it could work like a latch. Flourish B's flowers were removed. I painted the latch and corners. The corners were painted black with my eyes shut (on purpose), and I was able to ink the bare spots brown.  


Thanks for stopping by and checking out my altered keepsake box. Have a great day!


Thursday, August 21, 2014

Wood ATC and a Gelli Plate


Artist trading cards are always fun to make.  I find that working in a small size is challenging.  The hardest part for me is covering up my background.  Backgrounds can stand on their own.  When you select the right elements, that's when the magic happens.

Here is my finished project, four ATCs lined up.


The first thing you're going to notice is that the heads don't match.  I only had three kids heads. I chose the illustrated head to go on the fourth card.  Don't worry, I have added "the heads of children" to my next shopping list.

What I want you to know about this set of ATCs is that they are made on wood from Unique Laser Designs.  And they were so easy to make!

First, gesso your wood.  Gesso is your friend.  It primes your surface and makes your paint appear more vivid.   Then apply your base color to the ATC.  I used a bright green.


While the gesso was drying, I used my die cut machine to cut several pieces out of old greeting cards.  Thick glossy cards make excellent reusable templates for several projects.  Just don't tell that relative that sends these cards how you use their store bought mementos.  (If you don't make your own cards, support your local crafty person!)  And if either of these options are not available in your home, file folders are the next best thing.


I decided to used my Gelli plate to make the background of this ATC set.  I then used my die cutter to make a template to use on the Gelli plate.

For the next layer of paint, I had chose orange.  I applied it to my Gelli Plate and set down my ATCs.  When I pulled the ATCs up, I saw orange.  Too much orange.  I spritzed the ATCs with water and then wiped the centers clean of the orange, just leaving a bit of orange around the edges.


I opted for pink instead.  After seeing how the paint transferred to the ATC, I also decided to use the "ghost image" on the ATC.  I put the pink paint on the Gelli Plate, put on the die cuts, then peeled them back off.  Then I placed the wooden ATCs onto the Gelli Plate.  The result was a finer, less blobby transfer print.  


This is how the ATCs looked after the Gelli treatment:


I was thrilled with the result and wanted to keep them the way they were.  I convinced myself to go on with my project.  Using black ink, I grunged them up a wee bit and inked the edges of the cards.  

After searching through my stash, I found colorful rub-ons.  I applied these to the four cards.  


I finished the ATCs off with the collage heads, flowers and the ULD word blocks.  Here are the individual ATCs.


Brave


Dream

Hope

Joy

Unique Laser Designs products used:

ATC set
Brick Wall Stencil
The words blocks are the bricks from the stencil!


As always, thanks for stopping by.  Your visits are always appreciated!


Saturday, August 16, 2014

Fairies and Flowers


Fairies and flowers are made for each other.  Beautiful flower gardens are made to attract fairies, attendance by birds, bees, and butterflies are just a happy side effect.


I put together this mini album with the idea of using this cute fairy from Unique Laser Designs.  I think she is so sweet!

Again I have paired this embellishments with a Graphic 45 collection.   I usually refer to G45 as "the big guns."  Does anyone else feel this way?  This time I used Secret Garden.  I thought the fairy would be perfect with that collection and I had enough supply to build a mini album.

I started my fairy just like one of my Unique Laser Designs design team members had.  (We are like crafty twins separated at birth! And her name is Lea.  Lee and Lea!  See her fairy here.)


I applied gesso to the fairy's wings and dress, but not on her "skin" as I wanted to leave the warmth of the wood to come through the paint.  I then painted the fairy with Lindy's Magicals.  I love these paints!

The other laser cuts I used are "Border Swirl D," which come in a pair.  These were painted with Distress Ink, then topped with Glossy Accents.  I would have added more chipboard, but I had to be able to close the album.


Now let's see if you can watch the whole album!


Thanks for stopping by!